
Author name: Food Lovey Team

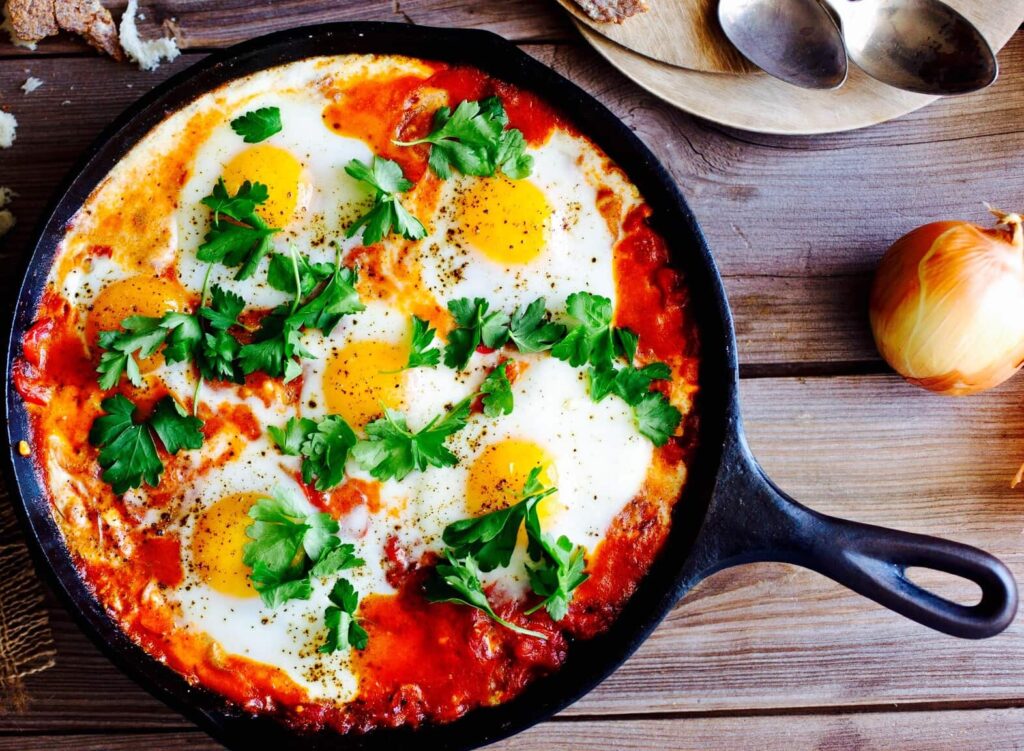
ISRAELI SHAKSHUKA
More Ideas

Authentic Israeli Shakshuka Recipe – Flavorful One-Pan Eggs in Rich Tomato Sauce

Ready In: 1 Hour 15 MinutesIngredients: 9Serves: 6 Bring bold Middle Eastern flavor to your kitchen with this authentic Israeli shakshuka recipe. Made with perfectly poached eggs simmered in a rich tomato and pepper sauce, this comforting one-pan dish is ideal for breakfast, brunch, or even a light dinner. Packed with fresh vegetables, warm spices, and savory goodness, shakshuka is a healthy and satisfying meal loved around the world. This easy homemade shakshuka recipe combines juicy tomatoes, bell peppers, onions, and eggs into a delicious skillet meal perfect for food lovers searching for healthy Mediterranean recipes in the USA. Why You’ll Love This Israeli Shakshuka This classic shakshuka recipe is simple, nutritious, and loaded with vibrant flavor. The slow-cooked tomato sauce creates a rich base for perfectly soft eggs, while jalapeño adds a subtle spicy kick. It is perfect for anyone searching for: Ingredients How To Make Israeli Shakshuka Sauté the Vegetables Heat olive oil in a large nonstick deep sauté pan over medium heat. Cook the diced onions until soft and translucent. Add the red bell peppers and continue sautéing until tender. Build the Tomato Sauce Reduce the heat to low and stir in the chopped fresh tomatoes. Cook until the tomatoes begin to soften and break apart. Add the chunky portions of the chopped tomatoes along with the diced jalapeño pepper. Simmer partially covered for 30 to 40 minutes, stirring occasionally. If the sauce becomes too thick, slowly add extra tomato liquid as needed. Season generously with kosher salt and black pepper. Add the Eggs Once the tomato mixture becomes thick and rich, crack the eggs carefully over the sauce, giving each egg its own space. Cover the pan tightly and simmer for about 20 minutes until the egg whites are fully cooked while the yolks remain soft and creamy. Best Ways To Serve Shakshuka Serve this hearty Israeli shakshuka with: This flavorful egg skillet also pairs beautifully with fresh avocado or hummus. Tips For Perfect Shakshuka Use Ripe Tomatoes Fresh ripe tomatoes create deeper flavor and natural sweetness. Simmer Slowly Slow cooking helps develop a thick, rich tomato sauce. Do Not Overcook the Eggs For the best texture, keep the yolks slightly runny. Final Thoughts This authentic Israeli shakshuka recipe is rich, comforting, and packed with wholesome Mediterranean flavor. With tender eggs simmered in a savory tomato sauce, it is the perfect one-pan meal for breakfast, brunch, or dinner. If you love healthy comfort food, easy skillet recipes, or traditional Middle Eastern dishes, this homemade shakshuka deserves a spot in your weekly meal rotation. The Source of this recipe is food.com
Mozzarella-Sticks-Recipe
More Ideas

Crispy Homemade Mozzarella Sticks – The Ultimate Cheesy Party Snack Recipe

Ready In: 15 MinutesIngredients: 7Yields: 12–16 Sticks Nothing beats hot, crispy mozzarella sticks loaded with gooey melted cheese and served with rich marinara sauce. These homemade mozzarella sticks are crunchy on the outside, perfectly cheesy on the inside, and incredibly easy to make. Whether you need a quick appetizer, game-day snack, or party favorite, this classic comfort food recipe always delivers. With simple pantry ingredients and fast cooking time, these fried cheese sticks taste even better than restaurant versions. Why You’ll Love These Mozzarella Sticks These crispy cheese sticks are golden, crunchy, and packed with stretchy melted mozzarella. The double breadcrumb coating helps lock in the cheese while creating the perfect crispy texture. This easy appetizer recipe is ideal for anyone searching for: Ingredients How To Make Mozzarella Sticks Prepare the Coating Whisk together the eggs and milk in a bowl. Place flour in one shallow dish and Italian breadcrumbs in another. Bread the Cheese Coat each mozzarella strip lightly in flour. Dip it into the egg mixture, then roll it in breadcrumbs. Repeat the egg and breadcrumb coating one more time to create a thick crispy crust that keeps the cheese from leaking during frying. Freeze Before Frying Place the coated mozzarella sticks in the freezer for at least 6 hours or overnight. This important step helps the cheese stay firm while frying. Fry Until Golden Heat vegetable oil in a skillet over medium heat. Cook the mozzarella sticks for about one minute per side or until golden brown and crispy. Remove them quickly before the cheese begins to melt out. Drain on paper towels and serve hot with marinara or pizza sauce for dipping. Tips For Perfect Mozzarella Sticks Freeze Thoroughly Frozen cheese sticks fry better and hold their shape during cooking. Double Coat for Extra Crunch The second layer of breadcrumbs creates a restaurant-style crispy exterior. Use String Cheese for Convenience String cheese works perfectly and saves prep time. Best Dipping Sauces These cheesy mozzarella sticks pair perfectly with: Final Thoughts These homemade mozzarella sticks are crispy, cheesy, and packed with comforting flavor in every bite. Perfect for parties, movie nights, family snacks, or quick appetizers, they deliver classic restaurant-quality taste right from your kitchen. If you love easy fried snacks, cheesy comfort food, or crowd-pleasing appetizers, this mozzarella sticks recipe is guaranteed to become a favorite on your table. The Source of this recipe is food.com

CHICKEN TIKKA TOMATO MASALA
International Flavors

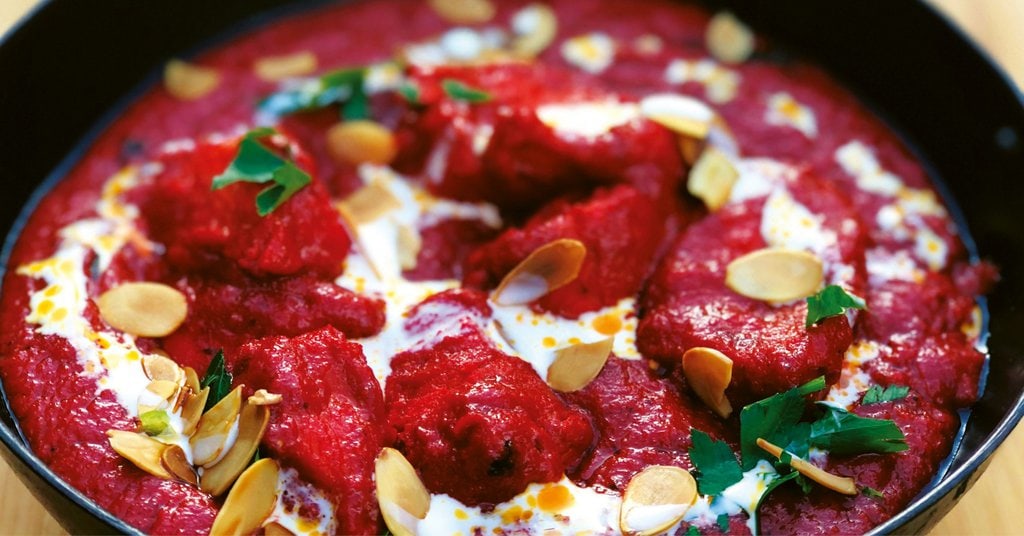
Restaurant-Style Chicken Tikka Tomato Masala – Creamy Indian Curry Packed With Bold Flavor

Ready In: 1 Hour 45 MinutesIngredients: 43Serves: 3 Craving rich Indian comfort food with smoky grilled chicken and velvety tomato curry? This chicken tikka tomato masala recipe combines juicy marinated chicken, aromatic spices, creamy gravy, and authentic Indian flavors into one unforgettable dish. Perfect for weeknight dinners or special family meals, this homemade curry tastes just like your favorite restaurant version. Loaded with warming spices, tender chicken tikka, and buttery tomato masala sauce, this recipe is ideal for food lovers searching for authentic Indian chicken recipes in the USA. Why You’ll Love This Chicken Tikka Tomato Masala This creamy chicken curry delivers layers of flavor in every bite. The double-marinated chicken stays tender and juicy, while the rich tomato masala sauce creates a smooth, restaurant-quality texture. It is perfect for anyone searching for: Ingredients Chicken First Marinade Second Marinade Tomato Masala Gravy How To Make Chicken Tikka Tomato Masala Marinate the Chicken Mix the ingredients for the first marinade and coat the chicken pieces. Let marinate for 30 minutes. Dry roast coriander and cumin seeds until fragrant, then grind them. Combine with the remaining second marinade ingredients and coat the chicken again. Refrigerate for at least 6 hours or overnight for deep flavor. Grill the Chicken Thread the marinated chicken onto skewers and grill on high heat until lightly charred and cooked evenly. Remove from the skewers and set aside. Prepare the Tomato Masala Heat ghee in a pan and toast the whole spices until aromatic. Add tomatoes and simmer until soft and broken down. Blend the tomato mixture into a smooth puree after removing the cinnamon stick and bay leaves. Make the Creamy Curry Gravy Cook onions in ghee until golden brown. Blend almonds, coconut, and cream into a smooth paste. Add garlic, ginger, chilies, and ground spices to the onions. Stir in the tomato masala, almond mixture, tomato paste, honey, and water. Simmer until thick and creamy. Blend the sauce again for a silky texture, then return to the pan. Add cheese, cream, fenugreek leaves, and garam masala. Finally, stir in the grilled chicken pieces and cook for a few more minutes until fully coated in the rich curry sauce. Serving Suggestions Serve this flavorful chicken tikka tomato masala with buttery naan bread, basmati rice, or fragrant pilau rice. Garnish with fresh coriander for an authentic finishing touch. Final Thoughts This homemade chicken tikka tomato masala recipe delivers smoky grilled chicken and creamy tomato curry in every bite. Packed with authentic Indian spices, rich texture, and bold aroma, it is the perfect comfort food recipe for curry lovers. If you enjoy restaurant-style Indian recipes, creamy chicken curries, or flavorful homemade dinners, this satisfying dish deserves a place on your table. The Source of this recipe is food.com
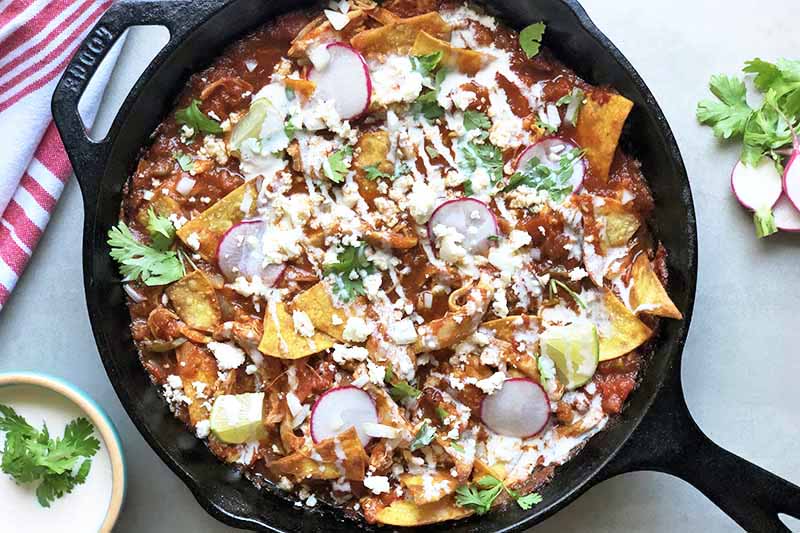
Best-Chicken-Chilaquiles
International Flavors

Easy Chicken Chilaquiles Casserole – A Cheesy Mexican Comfort Food Recipe

Ready In: 35 MinutesIngredients: 6Serves: 8 Looking for a quick Mexican-inspired dinner packed with flavor? This chicken chilaquiles casserole combines crispy tortilla strips, juicy shredded chicken, tangy tomatillo sauce, and melted cheese into one comforting baked dish. It is the perfect family-friendly recipe for busy weeknights, casual gatherings, or anyone craving authentic Mexican comfort food at home. With bold flavors and simple ingredients, this easy baked chicken casserole delivers restaurant-style taste with minimal effort. Why You’ll Love This Chicken Chilaquiles Recipe This cheesy chicken chilaquiles bake is loaded with crunchy textures, creamy toppings, and savory flavor. The crispy tortilla strips soak up the rich green tomatillo sauce while staying slightly crunchy for the perfect bite. It is ideal for anyone searching for: Ingredients How To Make Chicken Chilaquiles Prepare the Tortilla Strips Preheat your oven to 350 degrees Fahrenheit. Slice corn tortillas into thin strips. Heat vegetable oil in a large skillet and fry the tortilla strips until they become crispy and light golden brown. Watch carefully to prevent burning. Remove the strips with a slotted spoon and place them on paper towels to drain excess oil. Assemble the Casserole Spread the crispy tortilla strips evenly across the bottom of a 9×13-inch baking dish. Layer the shredded cooked chicken over the tortilla strips. Pour the green tomatillo sauce across the chicken, making sure everything is evenly coated. Sprinkle the shredded cheese generously on top. Bake Until Hot and Cheesy Cover the casserole dish with foil and bake for about 20 minutes or until heated through and bubbly. Remove from the oven and spread sour cream across the top before serving. Best Tips For Flavorful Chilaquiles Use Freshly Fried Tortillas Fresh tortilla strips create the perfect balance of crunch and texture. Choose Rotisserie Chicken Using rotisserie chicken saves time while adding rich flavor to the casserole. Add Extra Toppings Fresh cilantro, sliced avocado, jalapeños, or diced onions can elevate this Mexican casserole even more. What To Serve With Chicken Chilaquiles Pair this hearty casserole with Mexican rice, black beans, fresh salsa, or a crisp green salad. It also works beautifully as a brunch recipe or game-day party dish. Final Thoughts This easy chicken chilaquiles casserole is the ultimate blend of crunchy tortillas, tender chicken, creamy sour cream, and melted cheese. Packed with authentic Mexican flavors and simple ingredients, it is a satisfying comfort food recipe your family will request again and again. For food lovers searching for easy baked chicken recipes, cheesy Mexican casseroles, or quick dinner ideas, this delicious dish is a must-try for your next homemade meal. The Source of this recipe is food.com
CHICKEN CUTLETS
International Flavors

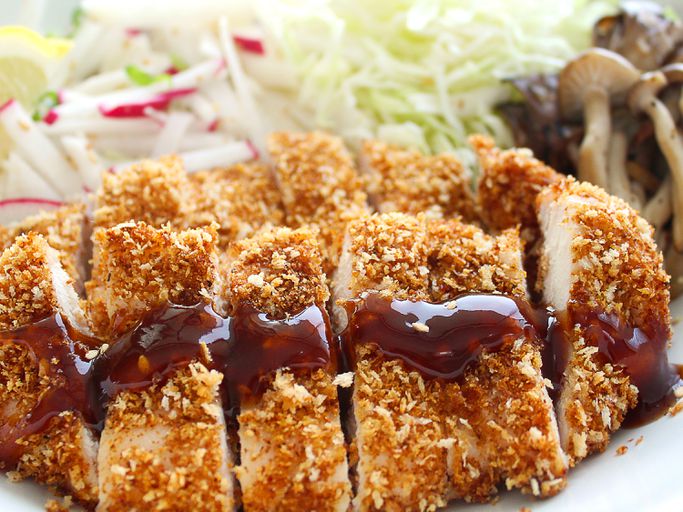
Crispy Panko Chicken Cutlets With Tonkatsu Sauce – The Ultimate Crunchy Chicken Dinner

Ready In: 37 MinutesIngredients: 14Serves: 4 If you love crispy fried chicken with bold Japanese flavors, these crunchy panko chicken cutlets with homemade tonkatsu sauce will become your new favorite comfort meal. This easy chicken recipe delivers golden texture, juicy meat, and a sweet-savory sauce that tastes restaurant-quality. Perfect for weeknight dinners, family meals, or food lovers searching for authentic Japanese-inspired recipes in the USA. Why You’ll Love These Crispy Chicken Cutlets These Japanese-style chicken cutlets are light, crunchy, and packed with flavor. The panko breadcrumbs create an airy crispiness that regular breadcrumbs cannot match. Paired with shredded cabbage and rich tonkatsu sauce, this dish offers the perfect balance of texture and umami flavor. Whether you are looking for crispy chicken breast recipes, Asian comfort food, or easy homemade Japanese recipes, this dish checks every box. Ingredients For the Chicken Cutlets For Tonkatsu Sauce How To Make Crispy Panko Chicken Cutlets Prepare the Chicken Using a sharp knife, lightly score both sides of the chicken breasts in a checkerboard pattern. Cover the chicken with plastic wrap and pound until each piece is about 1/2 inch thick. Season generously with kosher salt and black pepper. Bread the Chicken Coat each chicken breast in flour, then dip into the beaten egg mixture. Repeat the flour and egg process once more before covering the chicken completely in crunchy panko breadcrumbs. This double coating helps create extra crispy chicken cutlets. Fry Until Golden Heat about 1/4 inch vegetable oil in a deep sauté pan over medium-high heat. Once the oil begins to shimmer and bubble, lower the heat to medium-low. Fry the chicken in batches for 4 to 6 minutes per side until golden brown and fully cooked. Keep the oil bubbling steadily for the perfect crunchy texture. Drain the fried chicken on paper towels. Make the Tonkatsu Sauce In a small saucepan, whisk together Worcestershire sauce, sugar, soy sauce, and ketchup. Simmer over medium-low heat for about 10 minutes until slightly reduced. Whisk in Dijon mustard and ground allspice. Let the sauce cool to room temperature before serving. Store leftovers in the refrigerator for up to one week. Serving Suggestions Serve these crispy chicken cutlets with shredded cabbage and generous spoonfuls of homemade tonkatsu sauce. You can also pair them with steamed rice, Japanese potato salad, roasted vegetables, or fries for a complete meal. For extra flavor, garnish with sesame seeds, green onions, or a squeeze of fresh lemon juice. Pro Tips For Extra Crispy Chicken Use Japanese Panko Breadcrumbs Panko creates a lighter and crispier coating compared to traditional breadcrumbs. Do Not Overcrowd the Pan Frying in batches keeps the oil temperature stable and ensures even cooking. Pound the Chicken Evenly Uniform thickness helps the chicken cook faster and stay juicy inside. Final Thoughts These crispy panko chicken cutlets with tonkatsu sauce combine classic Japanese comfort food with easy home cooking techniques. The crunchy coating, tender chicken, and rich homemade sauce make this recipe ideal for busy weeknights or special family dinners. If you enjoy crispy fried chicken recipes, Japanese cuisine, or restaurant-style comfort food, this flavorful dish deserves a spot on your table. The Source of this recipe is food.com
vagan-pancakes-foodlovey
More Ideas

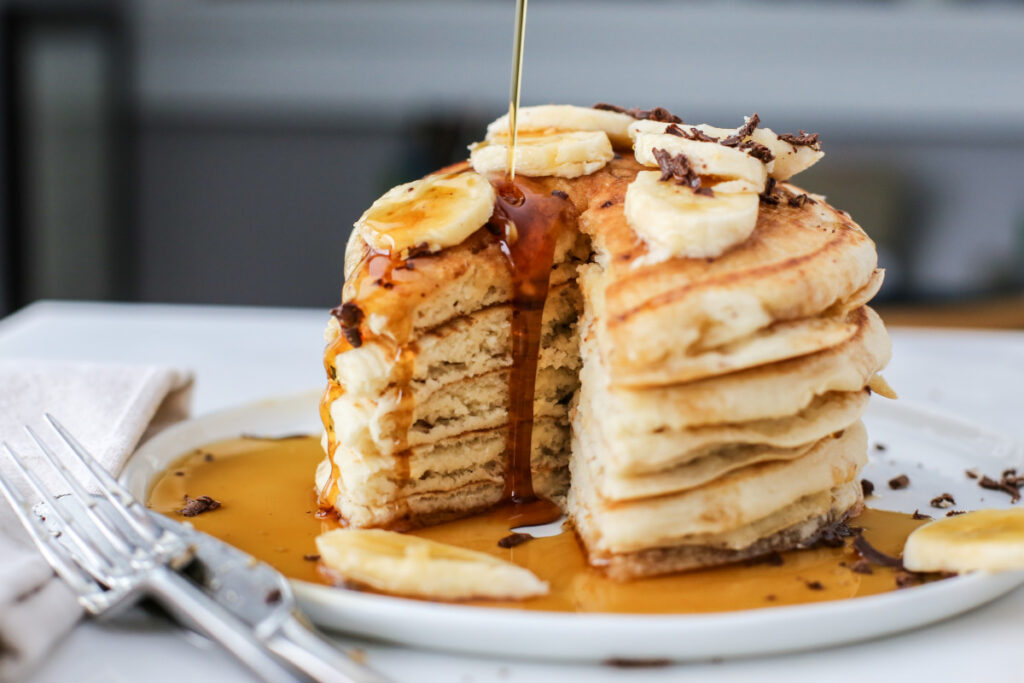
5 MINUTE VEGAN PANCAKES – Fluffy, Dairy-Free Breakfast Ready in Minutes

Start your morning with these quick and easy vegan pancakes that are soft, fluffy, and completely dairy-free. Perfect for busy mornings or a healthy plant-based breakfast, this recipe uses simple pantry ingredients to create light and delicious pancakes without eggs or milk. These pancakes cook fast, taste amazing, and are ideal for anyone looking for a vegan breakfast recipe that’s both satisfying and effortless. DIRECTIONS Set out all ingredients before starting. Heat a non-stick pan over medium heat on the stove. In a mixing bowl, combine the dry ingredients including flour, sugar, baking powder, and salt. Add the soy milk and vegetable oil to the bowl. Stir the mixture until smooth and lump-free. Once the pan is hot, pour one portion of batter into the pan for each pancake. Cook until bubbles form in the center and the edges begin to set. Carefully flip and cook the other side until golden brown. Repeat the process until all batter is used. Serve warm and enjoy immediately. INGREDIENTS (US UNITS) 1 cup flour (any preferred type)1 tablespoon sugar2 tablespoons baking powder1/8 teaspoon salt1 cup soy milk2 tablespoons vegetable oil READY IN 15 minutes INGREDIENTS COUNT 6 YIELDS 6–8 pancakes SERVES 2 The Source of this recipe is food.com
Baked-Chicken-Wings-foodlovey
Do Not Miss

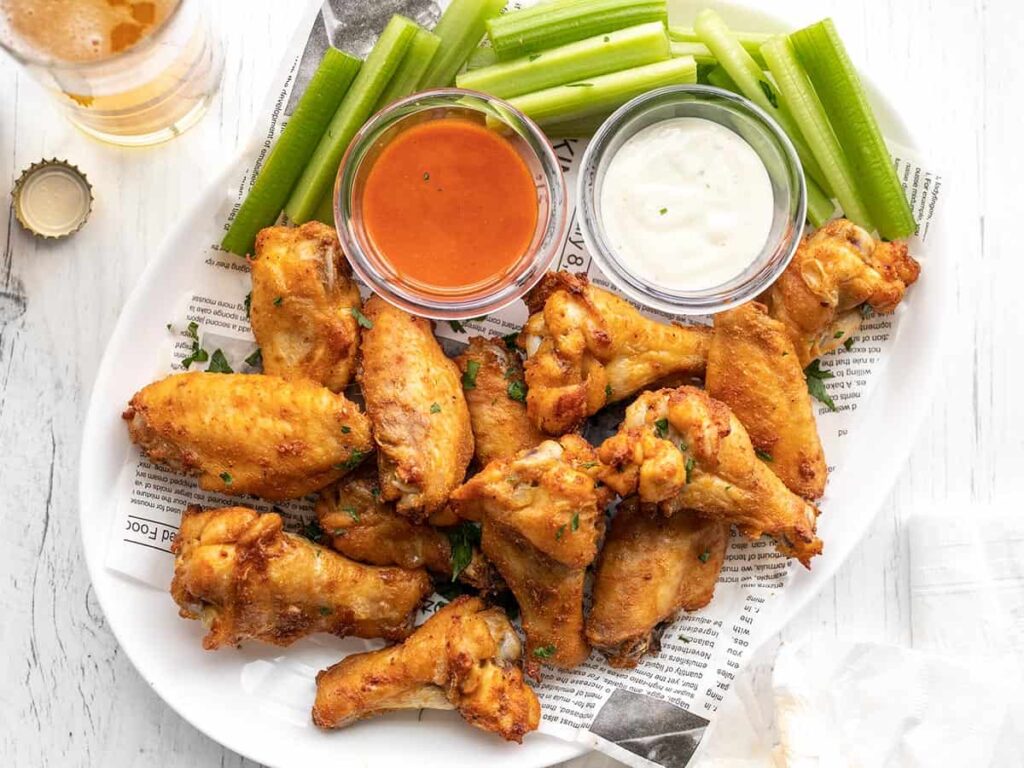
OVEN CRISP CHICKEN WINGS – Crispy, Juicy & Easy Baked Wings at Home

Enjoy perfectly crispy oven-baked chicken wings without deep frying. These flavorful wings come out golden, crunchy on the outside, and tender inside—making them a top choice for game day, family dinners, or party snacks. With simple pantry spices and a hot oven, you can create restaurant-style wings that are packed with bold flavor and satisfying crunch. DIRECTIONS Cut chicken wings at the joints and remove tips if needed. Preheat oven to 425°F. Make sure wings are fully thawed and pat them completely dry using paper towels for extra crispiness. In a large plastic bag, combine flour, paprika, garlic salt, black pepper, and cayenne pepper. Shake well to mix, then add wings and toss until evenly coated. Line a large baking sheet with foil and melt butter on the surface for easy cleanup. Place wings on the pan and turn to coat in butter. Bake for 30 minutes, flip the wings, then bake for another 15 minutes or until crispy, golden, and fully cooked. INGREDIENTS (US UNITS) 1/3 cup flour1 tablespoon paprika1 teaspoon garlic salt1 teaspoon black pepper1/4 to 1/2 teaspoon cayenne pepper3 tablespoons butter10 chicken wings (tips removed) READY IN 1 hour 5 minutes INGREDIENTS COUNT 7 SERVES 4 The Source of this recipe is food.com
whipped-cream-frosting-foodlovey
Desserts

The Ultimate Whipped Cream Frosting Recipe (Light, Fluffy & Bakery-Perfect in 7 Minutes)

WHIPPED CREAM FROSTING – Light, Fluffy & Ready in Minutes for Perfect Cakes Create a smooth, airy, and perfectly sweet whipped cream frosting that spreads beautifully and enhances any cake or dessert. This quick and easy recipe is ideal for home bakers who want a soft, bakery-style finish without heavy buttercream. Made with simple ingredients, this frosting delivers a creamy texture, balanced sweetness, and a fresh flavor that works perfectly for cakes, cupcakes, and layered desserts. DIRECTIONS Using a chilled mixing bowl and cold beaters, whip the heavy cream until it turns slightly frothy. Gradually add the sifted powdered sugar and vanilla extract while continuing to beat. Keep whipping until the mixture becomes light, fluffy, and thick enough to spread smoothly as frosting. Do not overbeat. Use immediately for best results. INGREDIENTS (US UNITS) 1 pint heavy cream (well chilled)1 cup powdered sugar (sifted)1 teaspoon vanilla extract VARIATIONS CHOCOLATE½ cup cocoa powder, sifted with powdered sugar COFFEE1 tablespoon instant coffee dissolved in the cream LEMON½ teaspoon lemon extractFresh lemon zest instead of vanilla ORANGE½ teaspoon orange extractFresh orange zest instead of vanilla NUT1 teaspoon almond extract instead of vanilla¾ cup finely chopped nuts folded in TIPSY1–2 tablespoons rum or bourbon instead of vanilla(Optional: lightly drizzle cake layers with the same liquid for extra flavor) READY IN 7 minutes YIELDS Frosting for one layer cake

20-Minute-Steak-Fajitas-foodlovey
Do Not Miss

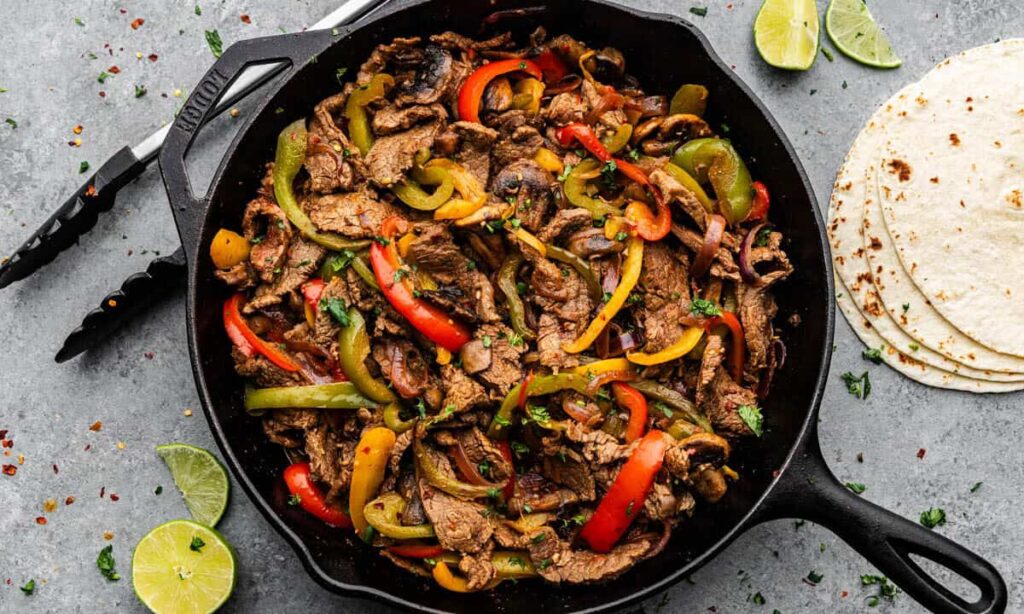
Sizzling Steak Fajitas in 20 Minutes: The Ultimate Weeknight Flavor Bomb for American Kitchens

Craving bold, restaurant-style flavors at home? These quick steak fajitas deliver juicy, tender beef, vibrant peppers, and smoky spices—all wrapped in warm tortillas. Perfect for busy families, meal prep lovers, and anyone searching for an easy fajita recipe, this dish is your go-to for a satisfying dinner in just 20 minutes. Welcome to FoodLovey.com, where flavor meets simplicity. 🌮 Why This Steak Fajita Recipe Is a Must-Try If you’re searching for best steak fajitas, easy Tex-Mex recipes, or quick dinner ideas for families, this recipe checks every box: 🥩 Ingredients for Classic Steak Fajitas Serves: 8 | Yields: 8 fajitas | Prep Time: 20 minutes Main Ingredients: Fresh Veggies: Optional Toppings: 🔥 How to Make Steak Fajitas (Step-by-Step Guide) 1. Prepare the Marinade In a bowl, combine olive oil, lime juice, garlic, chili powder, cumin, red pepper flakes, salt, and black pepper. Add sliced steak and toss until fully coated. Let it sit while prepping veggies. 2. Warm the Tortillas Wrap tortillas in foil and heat in a 350°F oven for 5–10 minutes until soft and warm. 3. Sauté the Vegetables Heat olive oil in a large skillet over medium-high heat. Add onions and bell peppers, cooking for 3–4 minutes until slightly tender. Remove and set aside. 4. Cook the Steak In the same skillet, add marinated beef. Stir and cook for 3–4 minutes until browned and no longer pink. 5. Combine & Finish Return veggies to the skillet. Toss everything together and cook for another minute to blend flavors. 6. Assemble the Fajitas Spoon the sizzling mixture into warm tortillas. Add your favorite toppings, fold, and serve immediately. 🌶️ Pro Tips for Perfect Fajitas 🧠 Nutritional & Cooking Insights This recipe is rich in protein, healthy fats, and essential nutrients, making it a balanced meal option. Using fresh vegetables and lean beef supports a wholesome home-cooked dinner lifestyle. 🍽️ Serving Ideas for American Families Pair your steak fajitas with: Perfect for family dinners, game nights, or casual gatherings. ⭐ Why FoodLovey.com Is Your Go-To Food Hub At FoodLovey.com, we bring you trending food recipes, easy cooking guides, and authentic flavors tailored for American kitchens. Whether you’re exploring quick meals, healthy recipes, or comfort food classics, we’ve got you covered. The Source of this recipe is food.com Make your kitchen sizzle tonight with these irresistible steak fajitas—only on FoodLovey.com! 🌮🔥

crockpot-roast-foodlovey
Do Not Miss

To-Die-For Crock Pot Roast – Juicy, Flavor-Packed Slow Cooker Beef Recipe

If you’re searching for a fall-apart tender beef roast that practically cooks itself, this Crock Pot Roast recipe is a game-changer. Loaded with rich flavors from savory seasoning blends and slow-cooked to perfection, this dish is a staple in American comfort food cooking. At FoodLovey.com, we bring you easy slow cooker recipes, trending food ideas, and family-friendly meals across the USA—and this one deserves a top spot on your dinner table. 🥩 Why This Crock Pot Roast Is So Popular 🛒 Ingredients (US Measurements) Serves: 8Ready In: About 9 hours 👨‍🍳 How to Make Crock Pot Roast 1. Prepare the Roast Place the beef roast directly into your slow cooker (crock pot). 2. Add Seasoning Mix In a bowl, combine the brown gravy mix, Italian dressing mix, and ranch seasoning.Sprinkle evenly over the roast to create a bold, savory flavor base. 3. Add Liquid Pour water around the roast to keep it moist and help create a rich gravy. 4. Slow Cook to Perfection Cover and cook on low heat for 7–9 hours until the beef is fork-tender and juicy. 🔥 Optional Flavor Boosts & Variations Take your roast to the next level with these easy tweaks: 🍽️ Serving Suggestions Serve this hearty crock pot roast with: It’s perfect for comfort food dinners, holiday meals, or cozy weekend cooking. ❤️ Final Thoughts This To-Die-For Crock Pot Roast lives up to its name—simple ingredients, bold flavors, and melt-in-your-mouth texture. Whether you’re feeding a crowd or prepping meals for the week, this slow cooker recipe delivers consistent, delicious results every time. The Source of this recipe is food.com Stay connected with FoodLovey.com for more easy recipes, comfort food ideas, and trending American dishes.
Scroll to Top