
Author name: Food Lovey Team

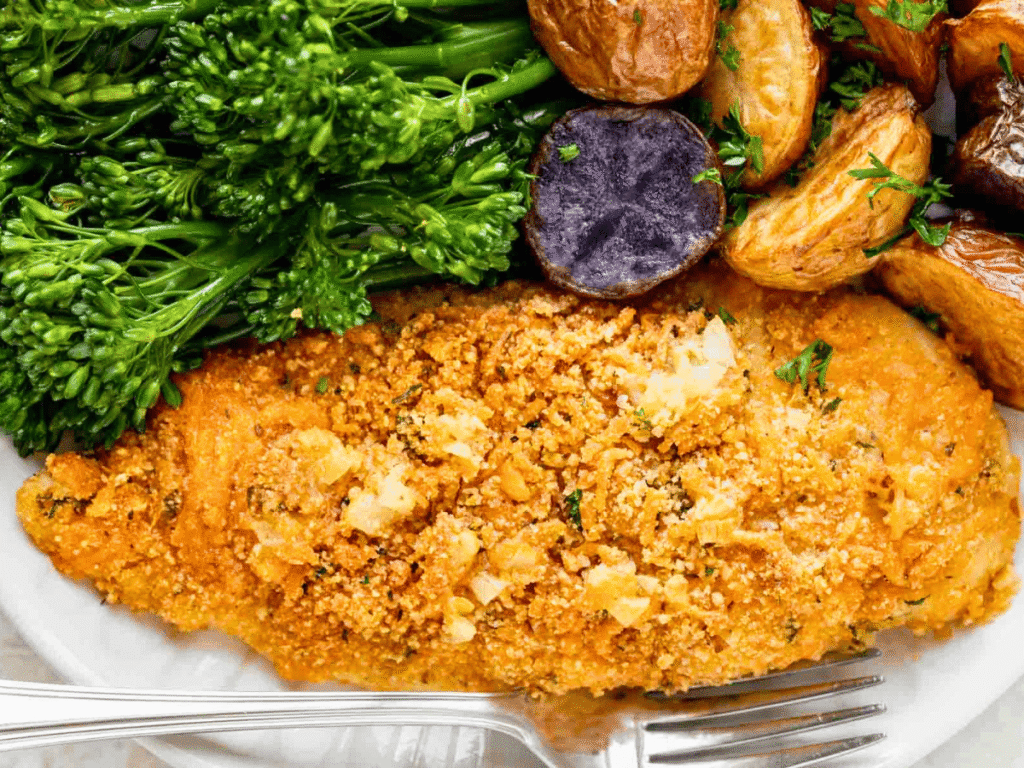
Garlic-Cheddar-Chicken
Food Lovey Choice

Crispy Cheddar Garlic Oven-Fried Chicken Breast – Juicy, Cheesy & Packed With Flavor

Ready In: 1 HourIngredients: 10Serves: 4 Craving crispy fried chicken without the mess of deep frying? This moist cheddar-garlic oven-fried chicken breast recipe delivers juicy chicken with a crunchy golden coating loaded with garlic, cheddar cheese, and savory parmesan flavor. Baked to perfection in the oven, this easy comfort food recipe gives you crispy texture and tender chicken in every bite. Perfect for family dinners, meal prep, or weeknight comfort food cravings, this baked chicken recipe tastes like restaurant-style fried chicken with less oil and easy cleanup. Why You’ll Love This Oven-Fried Chicken This crispy baked chicken breast recipe combines buttery garlic flavor with cheesy breadcrumbs for a crunchy coating that stays moist inside. It is rich, satisfying, and simple enough for beginner cooks. Perfect for anyone searching for: Ingredients How To Make Cheddar Garlic Oven-Fried Chicken Prepare the Oven and Pan Preheat the oven to 350°F. Butter an 11 x 7-inch baking pan. If using larger chicken breasts or extra portions, use a bigger baking dish for even cooking. Make the Garlic Butter Mixture In a bowl, combine melted butter, minced garlic, 1 teaspoon garlic powder, and seasoning salt. This buttery garlic mixture helps lock moisture into the chicken while adding rich flavor. Prepare the Crispy Coating In another bowl, mix breadcrumbs, grated cheddar cheese, parmesan cheese, remaining garlic powder, and black pepper. The cheese creates an extra crispy golden crust while baking. Coat the Chicken Dip each chicken breast into the garlic butter mixture, then coat thoroughly in the breadcrumb and cheese mixture. Place the coated chicken into the prepared baking pan. Bake Until Golden and Juicy Bake uncovered for 35 to 45 minutes or until the chicken is fully cooked and crispy outside. For an even crunchier texture, place the chicken on a baking rack inside the pan. Optional: Sprinkle shredded cheddar or mozzarella cheese on top during the final 5 minutes of baking. Best Side Dishes For Oven-Fried Chicken Serve this crispy chicken with: Tips For Perfect Crispy Chicken Use Freshly Grated Cheese Fresh cheese melts better and creates richer flavor. Do Not Overcrowd the Pan Space the chicken evenly for crispier results. Use a Rack for Extra Crunch Air circulation helps create a golden crispy coating. Final Thoughts This cheddar-garlic oven-fried chicken breast recipe is crispy, cheesy, juicy, and packed with bold homemade flavor. It delivers the comfort of fried chicken with the convenience of oven baking, making it perfect for busy families and comfort food lovers. If you enjoy easy baked chicken recipes, cheesy dinner ideas, or crispy homemade comfort food, this recipe deserves a place on your weekly menu at www.foodLovey.com. The Source of this recipe is food.com
broil-perfect-steak
More Ideas

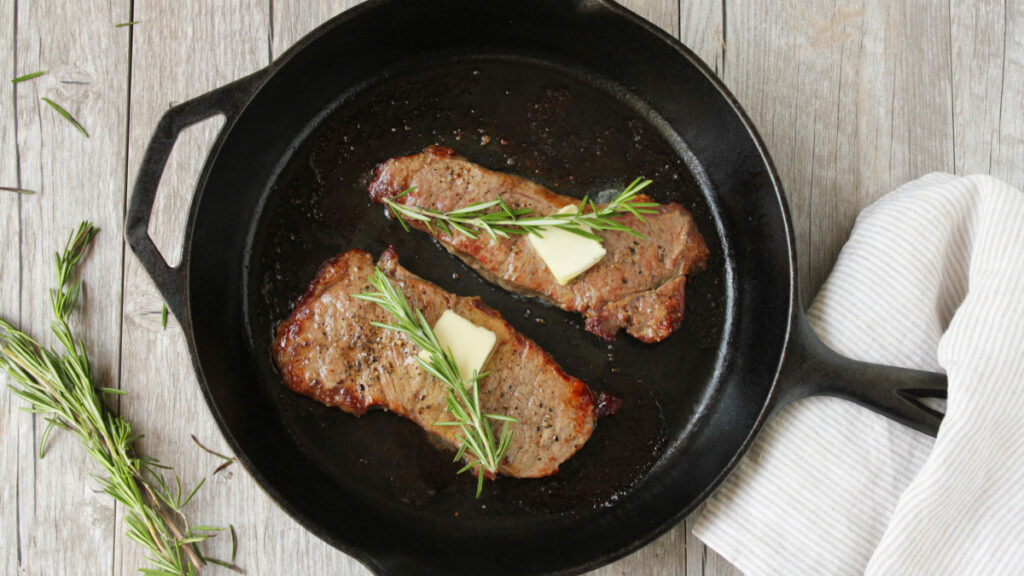
How to Broil the Perfect Steak – Juicy, Tender & Steakhouse-Style at Home

Ready In: 30 MinutesIngredients: 4Yields: 2 SteaksServes: 2 Skip expensive steakhouses and learn how to broil the perfect steak right in your own kitchen. This easy steak recipe creates a beautifully seared crust with a juicy, tender center using only a few simple ingredients and a cast iron skillet. Whether you prefer rare, medium, or medium-well steak, this foolproof cooking method delivers restaurant-quality results every time. Perfect for quick dinners, date nights, or protein-packed meals, this steak recipe is a must for meat lovers. Why You’ll Love This Broiled Steak Recipe This easy broiled steak method locks in flavor while creating a crisp caramelized crust. Using high oven heat and a hot cast iron skillet gives the steak a rich steakhouse-style texture without needing an outdoor grill. Perfect for anyone searching for: Ingredients Additional Items Needed How To Broil the Perfect Steak Bring the Steak to Room Temperature Allow the steaks to sit at room temperature before cooking. Pat dry with a clean cloth to remove excess moisture for better searing. Preheat the Oven and Skillet Move the oven rack about 6 inches below the broiler. Place the cast iron skillet in the oven and preheat under the broiler for 15 to 20 minutes. The skillet should be extremely hot before adding the steaks. Season the Steaks Rub the steaks with olive oil, kosher salt, and coarse black pepper. You can also add your favorite steak seasoning blend if desired. Sear Under the Broiler Carefully place the steaks into the hot skillet. Broil for 3 minutes on one side, then flip using tongs or a spatula. Never pierce the steak with a fork, as it releases flavorful juices. Broil the second side for another 3 minutes. Steak Cooking Time Guide After searing, reduce oven temperature to 500°F and continue cooking based on your preferred doneness: Rare (120–130°F) Medium (140–150°F) Medium-Well (150–160°F) Turn the steaks halfway through the remaining cooking time. Let the Steak Rest Remove the steaks from the oven and let them rest for 5 minutes before serving. Resting helps keep the juices locked inside for maximum tenderness. Serve on warm plates to maintain heat and flavor. Final Thoughts This easy broiled steak recipe delivers steakhouse-quality flavor with minimal ingredients and simple cooking techniques. Crispy on the outside and juicy inside, these steaks are perfect for quick dinners, special occasions, or satisfying comfort food meals. If you love homemade steak recipes, cast iron cooking, or restaurant-style dinners, this perfect broiled steak method belongs in your kitchen routine on www.foodLovey.com. The Source of this recipe is food.com
belgian-waffles
More Ideas

The Best Belgian Waffles Recipe – Crispy Outside, Fluffy Inside Breakfast Favorite

Ready In: 40 MinutesIngredients: 8Yields: 6 WafflesServes: 4–6 Start your morning with these golden Belgian waffles that are perfectly crisp on the outside and light and fluffy on the inside. This easy homemade waffle recipe delivers classic breakfast flavor with simple pantry ingredients and a rich buttery texture everyone loves. Whether you are planning a weekend brunch, family breakfast, or sweet breakfast-for-dinner meal, these Belgian waffles bring restaurant-style quality straight to your kitchen. Why You’ll Love These Belgian Waffles These homemade waffles are airy, soft, and packed with delicious vanilla flavor. Beaten egg whites create the signature fluffy texture that makes authentic Belgian waffles stand out from ordinary waffles. Perfect for anyone searching for: Ingredients How To Make The Best Belgian Waffles Prepare the Waffle Batter Preheat and lightly oil your waffle maker. In a large bowl, sift together flour, baking powder, salt, and sugar. Separate and Beat the Eggs Separate the egg whites from the yolks. Beat the egg whites until stiff peaks form. This step helps create extra light and fluffy waffles. Mix the Wet Ingredients In another bowl, whisk together egg yolks, milk, vegetable oil, and vanilla extract. Slowly pour the wet ingredients into the dry ingredients and mix until smooth. Fold in Egg Whites Gently fold the beaten egg whites into the batter. Avoid overmixing to keep the waffles airy and tender. Cook the Waffles Pour batter into the heated waffle iron and cook on medium-high heat for about 5 to 10 minutes or until golden brown and crisp. Serve hot and fresh. Best Toppings For Belgian Waffles Take your waffles to the next level with: These toppings make breakfast even more delicious and visually appealing. Tips For Perfect Belgian Waffles Beat Egg Whites Separately This creates the signature fluffy texture Belgian waffles are known for. Do Not Overmix the Batter Overmixing can make waffles dense instead of light and airy. Serve Immediately Fresh waffles taste best while still warm and crispy. Final Thoughts This Belgian waffles recipe is easy, comforting, and perfect for breakfast lovers who want crispy edges with a soft fluffy center. Made with simple ingredients and classic technique, these waffles deliver bakery-style results every time. If you enjoy homemade breakfast recipes, weekend brunch ideas, or easy sweet treats, these Belgian waffles are guaranteed to become a family favorite on www.foodLovey.com. The Source of this recipe is food.com

AwardWinningChili
More Ideas

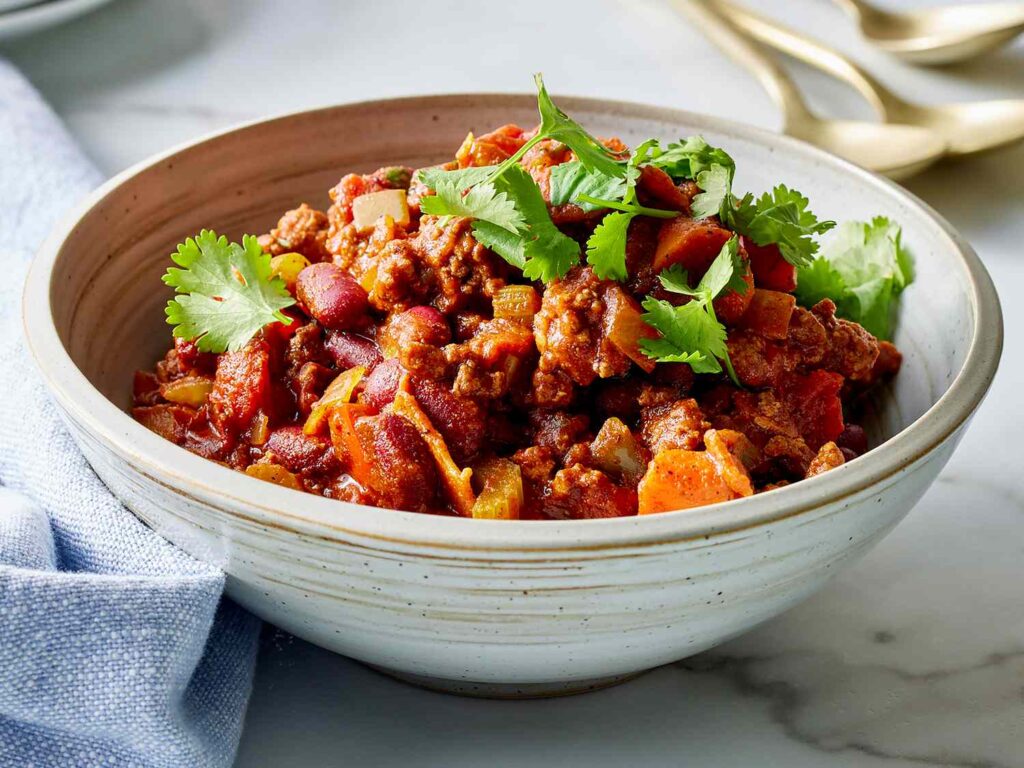
Award-Winning Homemade Chili Recipe – Bold, Hearty & Packed With Flavor

Ready In: 2 Hours 15 MinutesIngredients: 17Serves: 6 Craving a rich, hearty comfort food recipe that warms you from the inside out? This award-winning chili recipe delivers bold flavor, tender meat, and a perfectly spiced tomato base that tastes like it simmered all day. Made with simple pantry ingredients, beans, and smoky spices, this easy homemade chili is perfect for family dinners, game nights, or cold-weather meals. If you’re searching for the best chili recipe in the USA, this one-pot classic brings restaurant-quality taste straight to your kitchen. Why You’ll Love This Award-Winning Chili This homemade chili recipe is thick, savory, and full of deep flavor thanks to slow simmering and a balanced spice blend. Every spoonful delivers a comforting mix of meat, beans, and smoky heat. Perfect for anyone looking for: Ingredients Optional Toppings How To Make Award-Winning Chili Brown the Meat Heat olive oil in a large Dutch oven over medium-high heat. Add ground beef or turkey and cook until browned, breaking it into small pieces for even texture. Add Vegetables Stir in onions, bell pepper, and jalapeño. Cook until softened and aromatic. Drain excess grease for a cleaner, richer chili base. Build the Flavor Base Add Mexican-style tomatoes, tomato sauce, cumin, chili powder, salt, cayenne, paprika, and water. Mix well to combine all ingredients into a thick, flavorful base. Simmer the Chili Add kidney beans and black beans. Bring to a gentle simmer, cover, and cook for 1 to 2 hours. This slow cooking process enhances flavor and creates a rich, hearty texture. Best Ways To Serve Chili Enjoy this homemade chili recipe with: Pro Tips For Perfect Chili Let It Simmer Longer cooking enhances depth of flavor and thickens the chili naturally. Adjust Heat Level Add more cayenne or jalapeño for spicy chili lovers. Use Smoked Paprika It adds a deep smoky restaurant-style flavor. Final Thoughts This award-winning chili recipe is bold, hearty, and packed with rich Tex-Mex flavor. With tender meat, beans, and perfectly blended spices, it is the ultimate comfort food for any occasion. If you love easy one-pot meals, classic American chili recipes, or hearty family dinners, this flavorful chili deserves a spot in your weekly meal rotation at www.foodLovey.com. The Source of this recipe is food.com
banana-bread
More Ideas

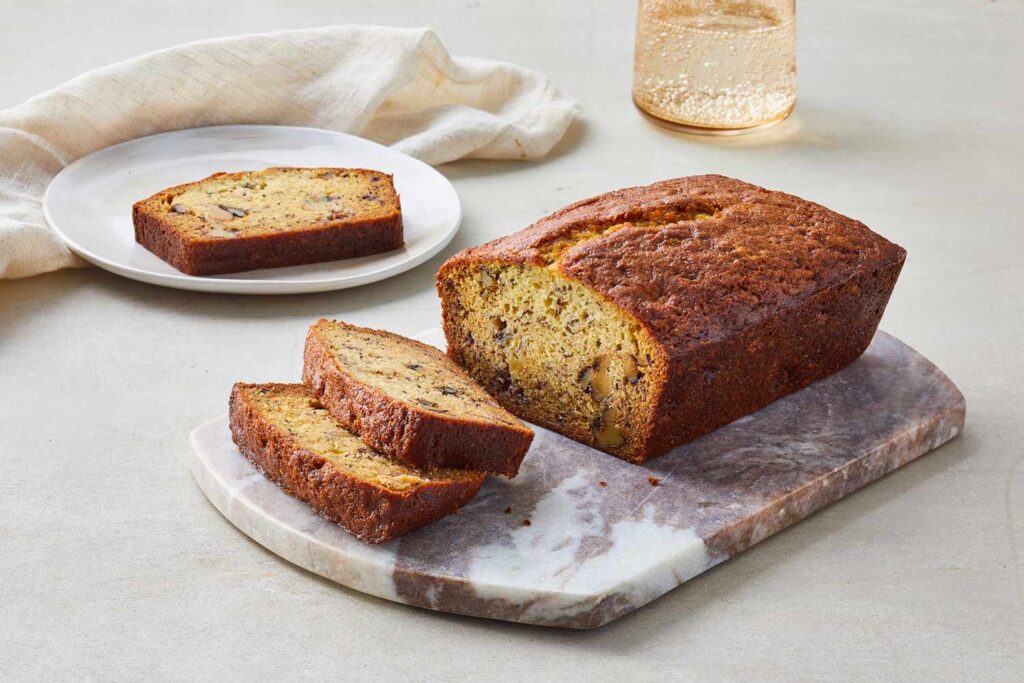
Moist & Delicious Banana Nut Bread Recipe – Easy Homemade Bakery-Style Loaf

Ready In: 1 Hour 20 MinutesIngredients: 10Yields: 18 Muffins or 1–2 LoavesServes: 18 Enjoy the ultimate homemade banana nut bread recipe that is soft, moist, and packed with rich banana flavor. This easy baking recipe is perfect for breakfast, snacks, or dessert and delivers bakery-style taste right from your kitchen. With ripe bananas, crunchy nuts, and a buttery sweet crumb, this classic comfort food never disappoints. If you are searching for easy banana bread recipes, moist quick bread ideas, or homemade muffin recipes, this one is a must-try favorite. Why You’ll Love This Banana Nut Bread This moist banana bread recipe is soft on the inside, lightly golden on the outside, and full of natural banana sweetness. The addition of walnuts or pecans adds a satisfying crunch in every bite. Perfect for anyone looking for: Ingredients How To Make Moist Banana Nut Bread Cream the Wet Ingredients In a mixing bowl, cream together butter and sugar until smooth and fluffy. Add vanilla extract and beaten eggs, mixing until well combined. Add Bananas and Milk Stir in mashed ripe bananas and milk, blending until the mixture becomes creamy and smooth. Mix the Dry Ingredients In a separate bowl, combine flour, salt, and baking soda. Slowly add the dry mixture into the wet ingredients, alternating to keep the batter soft and even. Fold in chopped nuts if using for extra crunch and flavor. Bake the Banana Bread Pour the batter into a greased and floured loaf pan or muffin cups. Bake at 350°F: Check doneness using a toothpick—if it comes out clean, your banana bread is ready. Let it cool before slicing and serving. Tips For Perfect Banana Bread Use Overripe Bananas The darker the bananas, the sweeter and more flavorful your bread will be. Do Not Overmix Mix just until combined to keep the bread soft and moist. Check Baking Time Ovens vary, so always test with a toothpick for best results. Serving Ideas Enjoy this banana nut bread: Final Thoughts This moist and delicious banana nut bread is an easy homemade recipe that brings comfort and flavor to every bite. Soft, fluffy, and packed with natural banana sweetness and crunchy nuts, it’s perfect for families, gatherings, or everyday baking. If you love easy baking recipes, homemade quick breads, or classic American desserts, this banana bread recipe is a timeless favorite you’ll make again and again. The Source of this recipe is food.com
skyline-chili-recipe
More Ideas

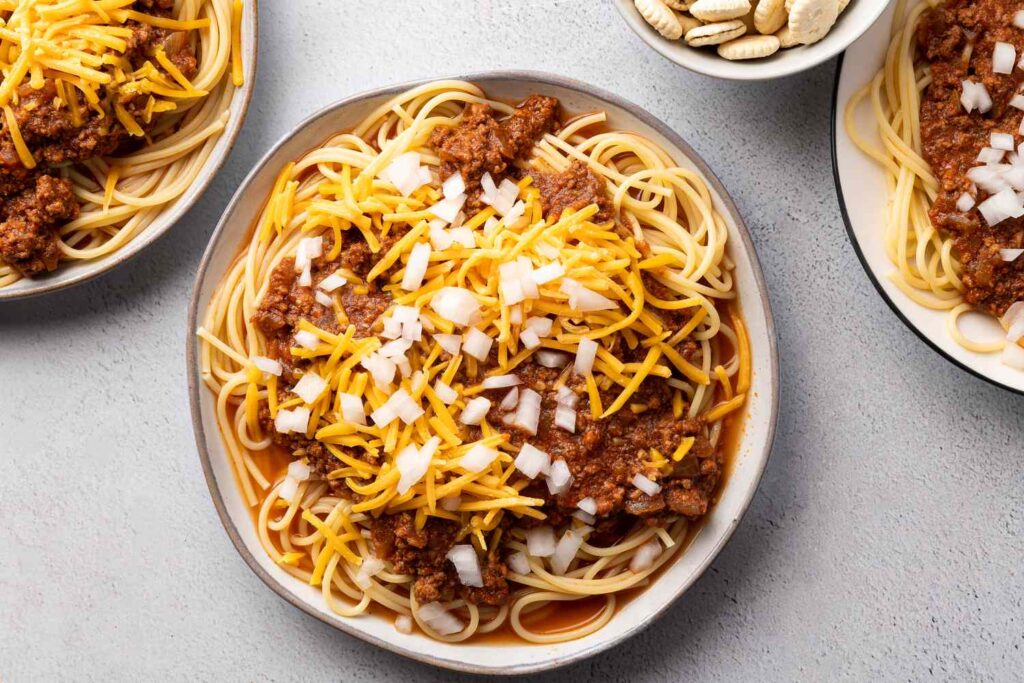
Best Skyline Chili Copycat Recipe – Sweet and Savory Cincinnati-Style Chili at Home

Ready In: 1 Hour 45 MinutesIngredients: 19Serves: 10–12 Bring the iconic taste of Cincinnati-style comfort food to your kitchen with this Skyline Chili copycat recipe. Rich ground beef, warm spices, tomato sauce, and a hint of chocolate create the signature sweet-savory flavor that makes this chili famous across America. Served over spaghetti or loaded onto chili dogs with heaps of shredded cheddar cheese, this hearty dish is the ultimate comfort meal for family dinners and game days. If you love bold chili recipes with unique flavor depth, this homemade Skyline-style chili is a must-try. Why You’ll Love This Skyline Chili Recipe Unlike traditional Texas chili, Cincinnati chili features a thinner, richly seasoned sauce infused with cinnamon, cocoa, cloves, and allspice. The result is a flavorful, aromatic chili that pairs perfectly with spaghetti, hot dogs, or classic toppings. Perfect for anyone searching for: Ingredients For the Chili Optional Toppings How To Make Skyline Chili Copycat Brown the Beef and Onions In a large pot, cook the ground beef and chopped onions over medium heat until browned and fully cooked. Drain excess grease before continuing. Build the Chili Base Add beef stock to the meat mixture and simmer for about 10 minutes to develop flavor. Stir in tomato sauce, chili powder, vinegar, Worcestershire sauce, chocolate, garlic, cinnamon, cumin, cayenne, cloves, allspice, salt, and bay leaf. Simmer Until Rich and Flavorful Cook the chili uncovered for about 1 hour, stirring occasionally. This slow simmer allows the spices and savory flavors to blend perfectly. Remove the bay leaf and skim excess fat from the surface before serving. Best Ways To Serve Cincinnati Chili This classic Skyline-style chili tastes amazing served: The famous “3-Way,” “4-Way,” or “5-Way” chili combinations are crowd favorites for authentic Cincinnati flavor. Tips For Authentic Skyline Chili Flavor Use Unsweetened Chocolate Chocolate adds subtle richness without making the chili sweet. Simmer Slowly Slow cooking helps develop the signature deep flavor profile. Serve With Extra Cheese A generous mound of shredded cheddar cheese is essential for authentic presentation. Final Thoughts This Skyline Chili copycat recipe delivers the perfect balance of savory beef, warm spices, tomato richness, and comforting texture. Whether served over spaghetti or spooned onto hot dogs, this Cincinnati-inspired dish brings classic American comfort food straight to your table. If you enjoy homemade chili recipes, regional comfort foods, or hearty family dinners, this flavorful Skyline-style chili deserves a place in your recipe collection. The Source of this recipe is food.com
japanese-restaurant-style-teriyaki-sauce-recipe
More Ideas

Best Homemade Teriyaki Sauce Recipe – Sweet, Savory, and Better Than Restaurant Style

Ready In: 6 MinutesIngredients: 8Yields: Approximately 1 1/2 Cups Skip the bottled sauces and make this rich homemade teriyaki sauce in just minutes. Packed with the perfect balance of sweet, savory, and umami flavor, this easy Japanese-inspired sauce transforms chicken, beef, seafood, noodles, and vegetables into restaurant-quality meals right at home. This quick teriyaki sauce recipe is smooth, glossy, and incredibly versatile, making it a must-have for busy weeknight cooking and homemade Asian dishes. Why You’ll Love This Homemade Teriyaki Sauce This easy teriyaki sauce delivers bold flavor using simple pantry ingredients. The soy sauce adds deep savory richness while brown sugar and honey create the perfect sweet glaze. It is ideal for anyone searching for: Ingredients How To Make Restaurant-Style Teriyaki Sauce Combine the Base Ingredients In a saucepan, mix soy sauce, water, ground ginger, garlic powder, brown sugar, and honey. Place the pan over medium heat and begin warming the mixture until it starts to simmer gently. Make the Thickening Mixture In a separate cup, whisk together cornstarch and cold water until completely smooth. Thicken the Sauce Slowly pour the cornstarch mixture into the simmering sauce while whisking continuously. Continue heating and stirring until the sauce thickens to your preferred consistency. If the sauce becomes too thick, simply add a little water to thin it out. Best Ways To Use Teriyaki Sauce This flavorful homemade sauce pairs perfectly with: It also works beautifully as a marinade, dipping sauce, or glaze for meal prep recipes. Tips For Perfect Teriyaki Sauce Use Low-Sodium Soy Sauce This helps balance the sweetness without making the sauce overly salty. Whisk Constantly Continuous whisking prevents lumps and creates a smooth glossy texture. Adjust Sweetness Add extra honey for a sweeter glaze or reduce sugar for a lighter flavor. Why Homemade Teriyaki Sauce Is Better Making teriyaki sauce from scratch gives you full control over flavor, sweetness, and ingredients. Unlike store-bought versions, homemade sauce contains fresher taste, no unnecessary preservatives, and a richer authentic texture. Final Thoughts This restaurant-style teriyaki sauce recipe is quick, flavorful, and incredibly easy to make at home. With its sweet-savory balance and glossy finish, it instantly upgrades simple meals into delicious Asian-inspired dishes. If you love homemade stir-fry recipes, easy cooking sauces, or fast weeknight dinners, this teriyaki sauce recipe deserves a permanent spot in your kitchen. The Source of this recipe is food.com

chicken fajitas with peppers
More Ideas

Sizzling Steak or Chicken Fajitas – Easy Mexican Skillet Dinner Ready in 20 Minutes

Ready In: 20 MinutesIngredients: 16Yields: 8 FajitasServes: 8 Bring restaurant-style flavor to your kitchen with these sizzling steak or chicken fajitas. Packed with juicy seasoned meat, colorful bell peppers, tender onions, and warm tortillas, this quick Mexican-inspired recipe is perfect for busy weeknights, family dinners, or casual gatherings. These homemade fajitas are bold, smoky, and incredibly easy to customize with your favorite toppings. If you love fast skillet meals with fresh ingredients and vibrant flavor, this easy fajita recipe is a must-try. Why You’ll Love These Easy Fajitas These steak or chicken fajitas are loaded with authentic Tex-Mex flavor while staying simple enough for beginner cooks. The lime marinade creates tender meat, while peppers and onions add sweet, savory balance. Perfect for anyone searching for: Ingredients For the Fajitas Toppings How To Make Steak or Chicken Fajitas Marinate the Meat Slice the steak or chicken into thin strips. In a bowl, mix olive oil, lime juice, garlic, chili powder, cumin, hot pepper flakes, black pepper, and salt. Add the meat strips and toss well to coat evenly. Warm the Tortillas Wrap the flour tortillas in foil and heat in a 350°F oven for 5 to 10 minutes until warm and soft. Cook the Vegetables Heat olive oil in a large nonstick skillet over medium-high heat. Add sliced onions and peppers, stirring frequently for about 3 to 4 minutes until softened and slightly caramelized. Transfer the vegetables to a bowl. Cook the Meat Add the marinated steak or chicken to the skillet and cook for 3 to 4 minutes until fully cooked and lightly browned. Return the peppers and onions to the skillet and stir together for another minute. How To Serve Fajitas Spoon the sizzling meat and vegetable mixture into warm tortillas. Top with salsa, sour cream, shredded cheese, and fresh chopped tomatoes. Fold the tortilla and serve immediately. Tips For Perfect Homemade Fajitas Slice Meat Thinly Thin slices cook quickly and stay tender. Use High Heat Cooking over high heat gives fajitas their classic smoky flavor. Customize the Toppings Add avocado, jalapeños, cilantro, or guacamole for extra flavor. Final Thoughts These easy steak or chicken fajitas are fast, flavorful, and perfect for anyone craving homemade Mexican comfort food. With juicy marinated meat, sautéed peppers, and warm tortillas, this skillet dinner delivers bold restaurant-quality flavor in just 20 minutes. If you love quick family dinners, Tex-Mex recipes, or sizzling skillet meals, these homemade fajitas will quickly become a favorite at your dinner table. The Source of this recipe is food.com

Beef_Broccoli
More Ideas

The Best Easy Beef and Broccoli Stir-Fry – Better Than Takeout in Just 25 Minutes

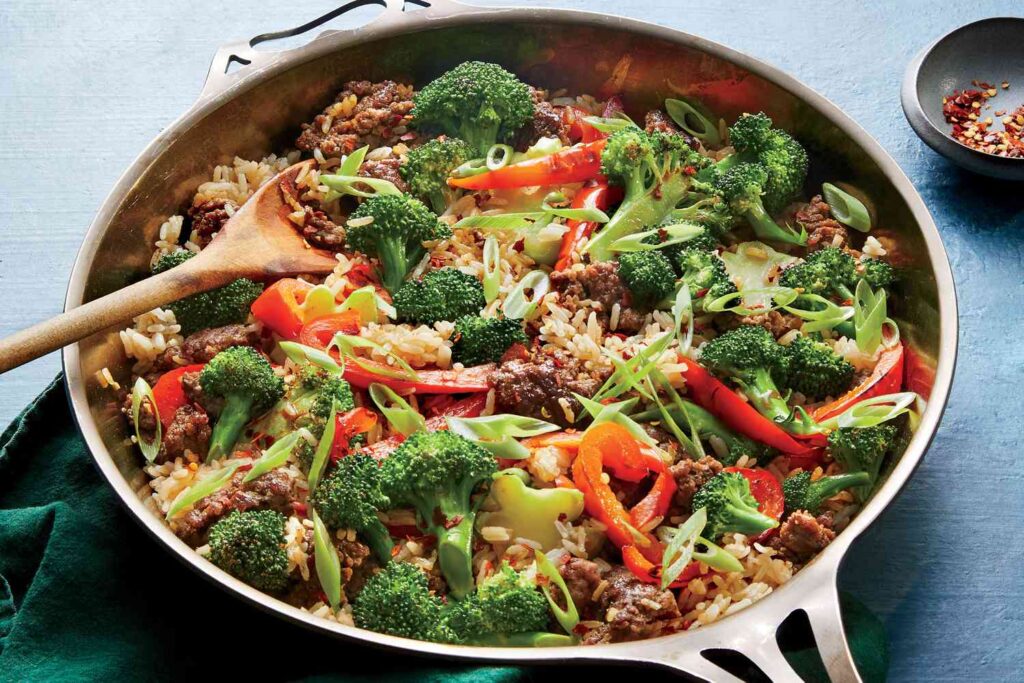
Ready In: 25 MinutesIngredients: 13Serves: 4 Skip the takeout and make this easy beef and broccoli stir-fry right at home. Packed with tender beef strips, crisp broccoli, savory garlic-ginger sauce, and rich Asian-inspired flavor, this quick dinner recipe is perfect for busy weeknights. It delivers restaurant-style taste with simple pantry ingredients and comes together in under 30 minutes. This homemade beef and broccoli recipe is a family favorite for anyone craving a fast, healthy, and satisfying stir-fry meal. Why You’ll Love This Beef and Broccoli Recipe This classic stir-fry combines juicy beef, fresh broccoli, and a flavorful soy sauce glaze for the perfect balance of sweet and savory taste. The rich sauce coats every bite beautifully while keeping the vegetables crisp and vibrant. It is perfect for anyone searching for: Ingredients How To Make Beef and Broccoli Stir-Fry Prepare the Beef In a bowl, mix 2 tablespoons cornstarch, 2 tablespoons water, and garlic powder until smooth. Add the sliced beef and toss until fully coated. This step helps create tender, flavorful beef with a silky texture. Cook the Beef Heat 1 tablespoon vegetable oil in a large skillet or wok over medium-high heat. Stir-fry the beef until cooked to your preferred doneness. Remove from the skillet and keep warm. Stir-Fry the Vegetables Add the remaining oil to the skillet and cook the onions for 4 to 5 minutes until softened. Add broccoli florets and cook for about 3 minutes until crisp-tender and bright green. Return the cooked beef to the pan. Make the Sauce In a small bowl, whisk together soy sauce, brown sugar, ginger, remaining cornstarch, and 1/2 cup water until smooth. Pour the sauce into the skillet and stir continuously for about 2 minutes until thickened and glossy. Best Ways To Serve Beef and Broccoli Serve this flavorful beef stir-fry over: Top with toasted sesame seeds for added crunch and flavor. Tips For The Perfect Stir-Fry Slice Beef Thinly Thin strips cook quickly and stay tender. Use High Heat A hot skillet helps create authentic stir-fry flavor and texture. Keep Broccoli Crisp Avoid overcooking to maintain fresh color and crunch. Final Thoughts This easy beef and broccoli stir-fry is a fast, flavorful, and budget-friendly dinner that tastes even better than takeout. With tender beef, crisp vegetables, and rich savory sauce, it is the perfect recipe for busy families and comfort food lovers alike. If you enjoy quick Asian-inspired meals, homemade stir-fry recipes, or easy one-pan dinners, this beef and broccoli dish deserves a spot in your weekly meal plan. The Source of this recipe is food.com
oven-baked-sea-bass
More Ideas

Easy Oven-Baked Sea Bass Recipe – Light, Flaky, and Full of Fresh Flavor

Ready In: 30 MinutesIngredients: 8Serves: 2 Looking for a healthy seafood dinner that feels elegant but takes minimal effort? This simple oven-baked sea bass recipe delivers tender, flaky fish infused with garlic, olive oil, herbs, and fresh lemon flavor. Perfect for busy weeknights or special dinners, this quick baked fish recipe is light, nutritious, and packed with Mediterranean-inspired taste. With fresh ingredients and easy preparation, this sea bass recipe is ideal for anyone craving restaurant-style seafood at home. Why You’ll Love This Oven-Baked Sea Bass This baked sea bass is juicy, flavorful, and incredibly easy to prepare. The garlic and olive oil mixture locks in moisture while Italian herbs and lemon create bright, fresh flavor in every bite. This healthy seafood recipe is perfect for people searching for: Ingredients How To Make Oven-Baked Sea Bass Prepare the Seasoning Preheat your oven to 450°F. In a small cup, combine minced garlic, olive oil, salt, and black pepper to create a flavorful seasoning mixture. Season the Fish Place the sea bass in a shallow glass or ceramic baking dish. Rub the garlic and olive oil mixture evenly over the fish. For added flavor and moisture, pour white wine or white wine vinegar around the fish if desired. Bake Until Flaky Bake the fish uncovered for about 15 minutes. Sprinkle Italian seasoning or fresh parsley over the top and continue baking for another 5 minutes, or until the thickest part of the fish flakes easily with a fork. Finish and Serve Drizzle the remaining pan juices over the baked sea bass and garnish with fresh lemon wedges before serving. Best Side Dishes For Sea Bass Pair this light seafood meal with: These side dishes complement the delicate flavor of the fish perfectly. Tips For Perfect Baked Sea Bass Use Fresh Fish Fresh sea bass creates the best texture and flavor. Avoid Overcooking Sea bass cooks quickly, so check for flaky texture after 20 minutes. Add Citrus for Bright Flavor Fresh lemon juice enhances the richness of the olive oil and herbs. Final Thoughts This simple oven-baked sea bass recipe is healthy, flavorful, and perfect for seafood lovers who want a quick homemade dinner without complicated steps. The combination of garlic, herbs, olive oil, and lemon creates a light yet satisfying dish ideal for any occasion. If you enjoy easy Mediterranean recipes, healthy baked fish meals, or fresh seafood dinners, this oven-baked sea bass deserves a place on your table. The Source of this recipe is food.com

Scroll to Top